Don't miss our Full range of woodworking tools - 20% OFF! Email: ruisen@wooditool.com
The Ultimate Guide to 16-Inch Framing Stud Layout Tools
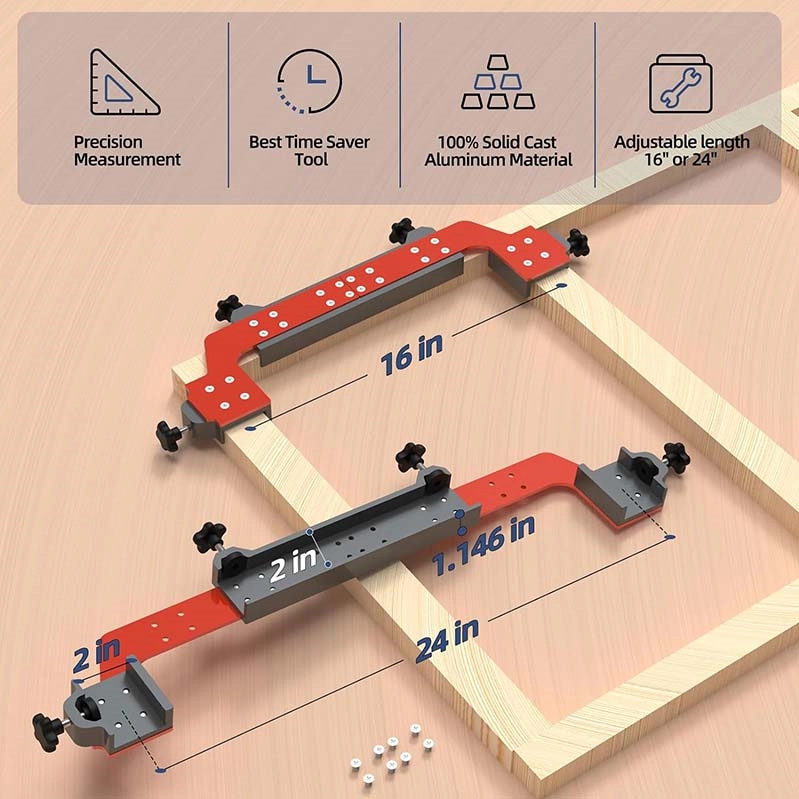
Framing a structure is the backbone of any construction project, and accuracy is paramount. One of the most crucial aspects of framing is laying out the framing studs with precision. In this blog, we’ll explore the essential role of 16-inch framing stud layout tools in construction. Whether you’re a DIY enthusiast or a professional builder, understanding how to use these tools correctly can make your projects safer, more efficient, and structurally sound.
The Significance of 16-Inch Stud Spacing
Before we dive into the tools, let’s understand why 16-inch stud spacing is the industry standard. This common practice is based on the typical width of construction materials such as plywood or drywall sheets. By spacing studs at 16 inches on center (oc), you ensure that the edges of these materials land at the center of a stud, providing a secure attachment point. This spacing is also a time-tested method for maintaining structural integrity in walls and ceilings.
Types of 16-Inch Framing Stud Layout Tools
- Framing Square:
- Usage: A framing square is a versatile tool for measuring and marking 16-inch stud layouts. It consists of two arms, one shorter and one longer, meeting at a 90-degree angle. The shorter arm has markings for common measurements, including 16 inches. You can use this tool to mark your studs quickly and accurately.
- Pro Tip: For precision, use a pencil or a carpenter’s marking knife along the edge of the framing square.
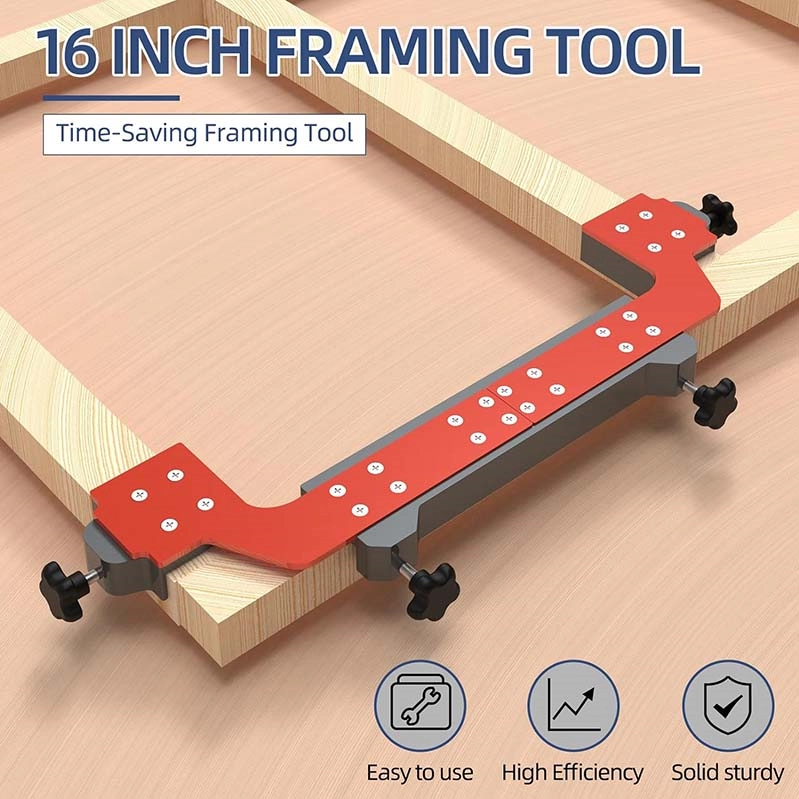
- 16-Inch Layout Guides:
- Usage: 16-inch layout guides are purpose-built for framing. These guides have pre-marked holes or notches at 16-inch intervals. Place the guide on your framing material and mark your stud locations through the holes or notches.
- Pro Tip: Secure the guide firmly to prevent it from shifting while marking.
- Chalk Lines:
- Usage: Chalk lines are essential for long stud layout runs. Attach a chalk line to one end of the wall or surface, stretch it to the desired length (e.g., 16 inches), and snap it to create a straight and precise layout line. Repeat the process for additional lines.
- Pro Tip: Use different colors of chalk to mark various layout lines for better visibility.
- Stud Finders:
- Usage: Electronic stud finders help you locate the edges of existing studs behind the wall, which can be especially useful in remodeling projects. Once you’ve found one stud, you can use a framing square or layout guide to mark the subsequent studs at 16-inch intervals.
- Pro Tip: Always calibrate your stud finder on the wall where you know the stud location before use.

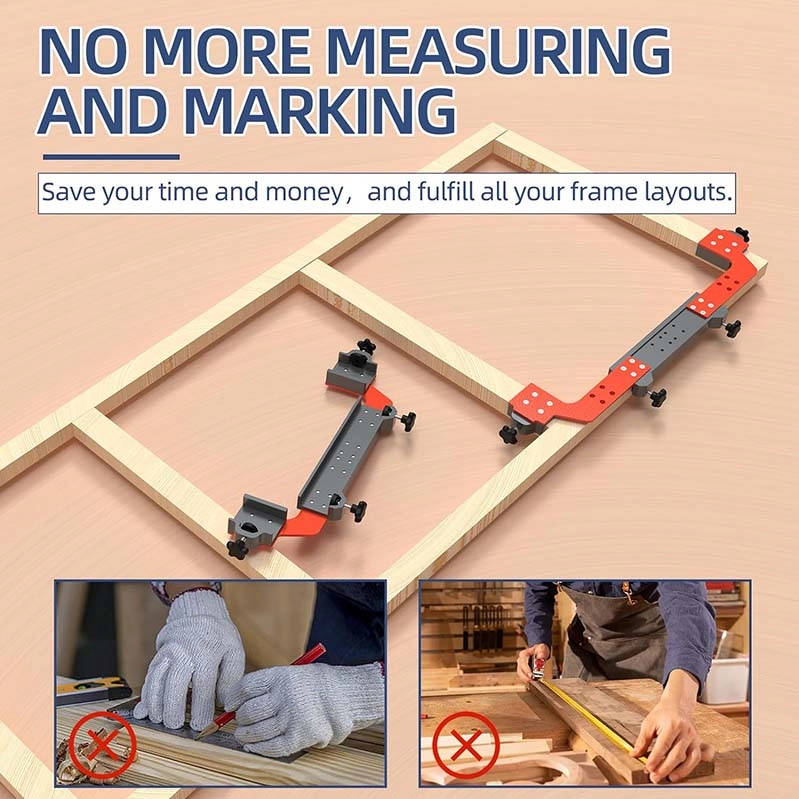
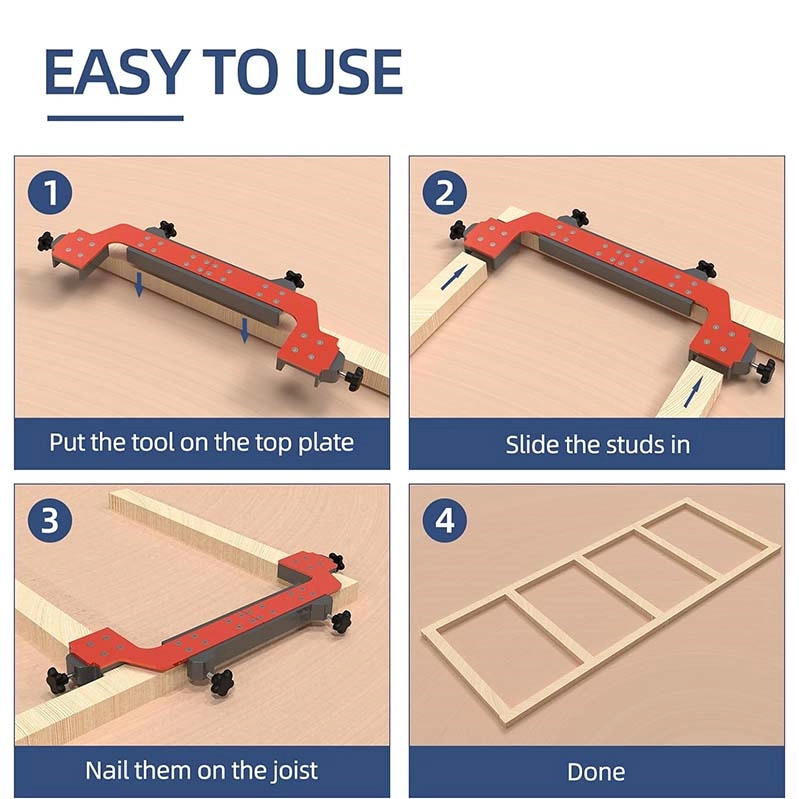
Using 16-Inch Framing Stud Layout Tools
- Measure Twice, Mark Once: Double-check your measurements before marking your layout. Precise measurements are critical for a sturdy structure.
- Marking Technique: When marking studs, make a clear, dark line that’s easy to see. If you’re using a framing square, align it accurately and mark along the edge.
- Plumb and Level: Ensure that your studs are plumb (vertical) and level (horizontal) during installation. A level and plumb bob can help with this.
- Consistency is Key: Maintain a consistent 16-inch spacing between studs, especially in wall framing. Deviating from this standard can lead to issues when installing drywall, sheathing, or other materials.
- Safety First: Always wear appropriate safety gear, such as safety glasses and gloves, when working with tools and framing materials.
The precision of 16-inch stud layout in framing is indispensable for the integrity and aesthetics of any construction project. By using the right 16-inch framing stud layout tools and techniques, you can ensure that your structures are not only sturdy but also ready for the installation of common construction materials like drywall or sheathing. Whether you’re a seasoned contractor or a DIY enthusiast, mastering the art of 16-inch stud layout is essential for quality and safety in your construction endeavors.
