Don't miss our Full range of woodworking tools - 20% OFF! Email: ruisen@wooditool.com
Understanding the Role of Marking Gauges in Woodworking
Marking gauges are indispensable tools in the world of woodworking, allowing woodworkers to achieve precise and accurate markings on their projects. Whether it’s laying out joinery, creating layout lines, or marking reference points, marking gauges play a crucial role. In this article, we will explore the different types of marking gauges, their components, and delve into their various applications in woodworking.
1:Types of Marking Gauges
There are several types of marking gauges available to woodworkers. The two most common types are wheel gauges and cutting gauges. Wheel gauges feature a small wheel or spur that rolls along the surface of the wood, while cutting gauges have a blade or cutter that scribes the wood. Both types offer their advantages and are suitable for different woodworking tasks.
2:Components of a Marking Gauge
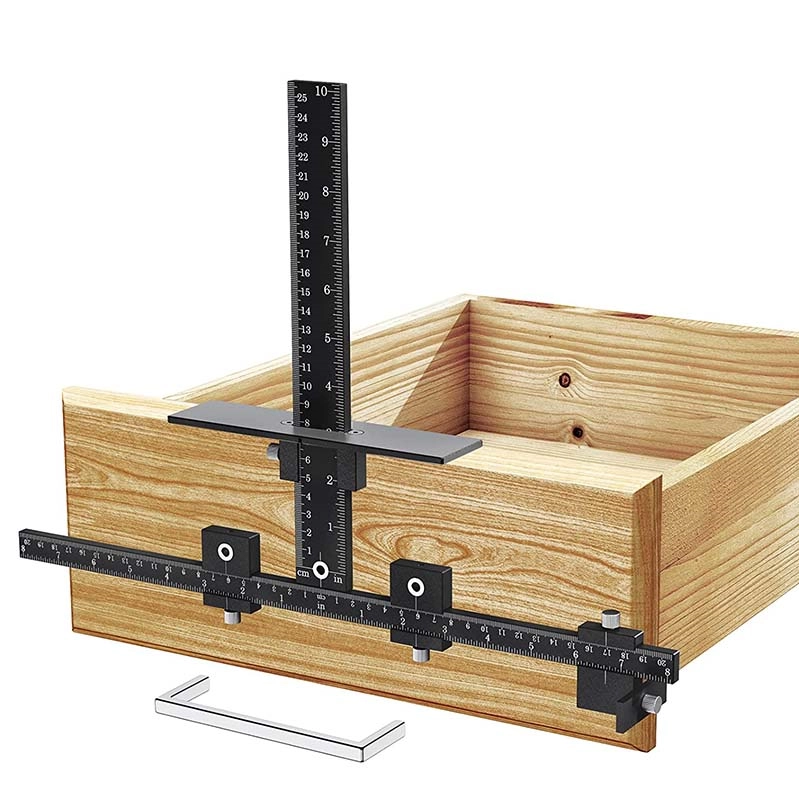
A marking gauge typically consists of three main components: the stock, the marking mechanism, and the fence. The stock is the body of the gauge that provides stability and control. The marking mechanism, whether it’s a wheel or a cutter, is responsible for making the actual mark on the wood. The fence acts as a reference surface that ensures consistent and accurate positioning of the gauge.
3: Applications of Marking Gauges in Woodworking
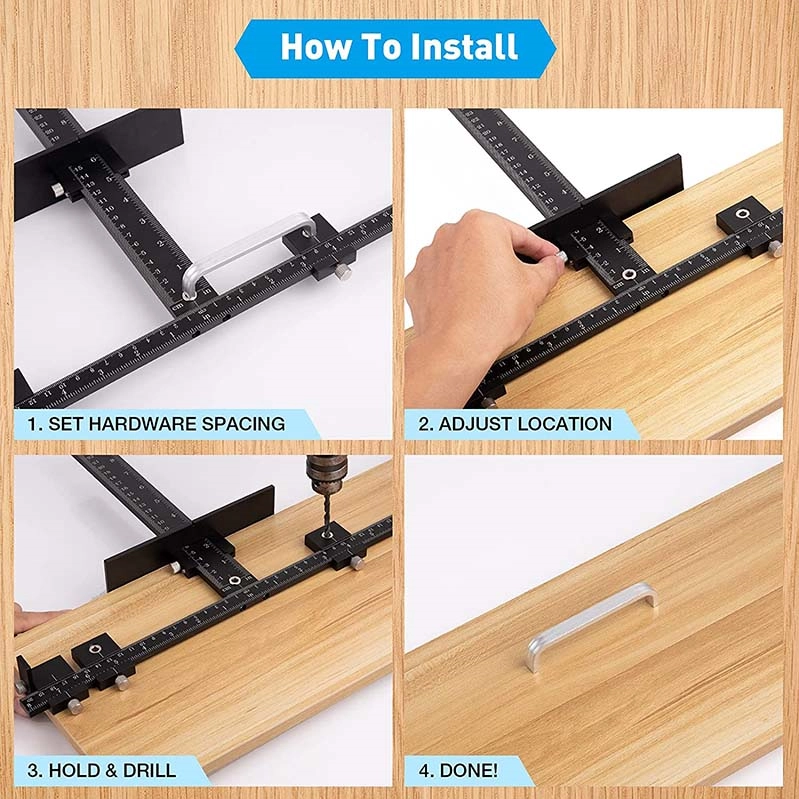
Marking gauges find numerous applications in woodworking projects. They are commonly used for laying out joinery, such as mortise and tenon joints, dovetails, and housing joints. The precise markings made by a marking gauge help ensure tight-fitting and well-aligned joints. Additionally, marking gauges are used to create layout lines for cutting, shaping, and drilling operations. They can also be used to mark reference points for decorative detailing or for aligning hardware installation.
4:Techniques for Using Marking Gauges
To use a marking gauge effectively, it is important to understand proper techniques. Start by adjusting the gauge to the desired measurement using the locking mechanism or thumbscrew. Place the fence of the gauge against the reference edge or face of the wood and firmly hold it in place. Then, gently glide the wheel or cutter along the surface, applying enough pressure to create a visible and accurate mark. It’s crucial to maintain control and stability throughout the marking process to achieve precise results.
5:Maintenance and Care
To ensure the longevity and optimal performance of your marking gauge, regular maintenance is essential. Keep the gauge clean by removing any debris or wood shavings after each use. Lubricate the moving parts periodically to ensure smooth operation. Sharpen or replace the blade or wheel as needed to maintain clean and accurate marking.
Conclusion
Marking gauges are valuable tools in the arsenal of a woodworker, allowing for precise measurements and layout lines. Understanding the different types of marking gauges, their components, and how to use them effectively will enhance your woodworking skills and help you achieve accurate and professional results in your projects.
